Donnerstag, 30. Juli 2015

Raupen - Gleich und doch nicht gleich: die Spiegeltechnik

Ohhhh ja, dieses Stempelset hat es mir direkt angetan als ich es gesehen habe. Hach, ist die Raupe nicht super süß? Ich kann mich so freuen, denn ich habe das Set zum Geburtstag geschenkt bekommen, juchu! Danke nochmals, Mädels!!!
Ooooh yes, I immediately fell in love with this stamp set when I saw it. Isn´t the caterpillar cute? I am so lucky, since I got it for my birthday! Thank you again, my dear crafty girl friends!


Die Haupttechnik, die sich hinter dieser Karte verbirgt ist das Spiegeln von Stempeln. Ihr mögt gedacht haben, dass die beiden Raupen verschiedene Stempel sind, doch weit gefehlt. Die Raupe rechts ist der Originalabdruck, links ist sie gespiegelt. Wenn Ihr mal ein Motiv benötigt, dass gespiegelt ist, dann könnt Ihr es zunächst auf einen Acrylblock oder auf die Rückseite eines flächigen anderen farblosen Stempelgummis stempeln um es dann widerum auf Eurer Karte abzudrücken. So ist das ganze dann gespiegelt zu sehen. Man kann diese Technik prima verwenden, wenn man eine Spiegelung auf dem Wasser erzeugen möchte, oder das Motiv einfach in die andere Richtung schauen soll, oder man zwei ähnliche aber nicht genau gleich Motive haben möchte oder wenn man bei einem nicht durchsichtigen Stempel genau sehen möchte, wo er abgedrückt wird. All das könnt Ihr mit der Spiegeltechnik erreichen. In meinem Fall habe ich dann noch den gespiegelten Abdruck mit einem Fineliner nachgezeichnet.
The technique, which is the underlying motif of this card is to create a mirror image. You might have thought, that the caterpillars are two different stamps, but actually one is the mirror image of the original. If you should happen to be in need for a mirror image sometime, you can easily achieve that by stamping your stamp on an acrylic block or the back side of a broad clear stamp. Afterwards you press this image on your card. That is it! Your image is then mirrored. One can nicely use this technique, when you want to create a mirror on water for example, or when you want to have the image look into the other direction or simply, if you want to have a very similar image, but not exactly the same. What is also nice is, that you can see well where you place your image, because you can look through the acryl block or the clear stamp. If you should be in need for a proper placement of a stamp which is not look through you can also use this technique. In my case I went over the lines of the mirror image again with a fine liner pen.

Materialliste
Supplies
Stempel / stamps: Jofy Paper Artsy; Papermania PMA 9073000
Stempelkissen / stamp pad: Memento tuxedo black
Copics RV02, RV04, RV09, YG11, YG23, YG25, G99, G94, BG96

An den folgenden Challenges möchte ich mit meiner Karte teilnehmen.
I would like to participate into the following challenges with my card.
Great Impressions
July Challenge - Use your favorite stamp
Karten-Kunst
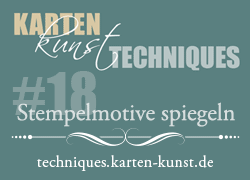
Technique #18 - Stempelmotive spiegeln
MFT Card Challenges
Color Challenge #26

Mittwoch, 29. Juli 2015

Addicted to Gerbera

Endlich kann ich Euch auch meine erste Karte mit dem tollen Blumenstempelset von Create a Smile zeigen, dass ich mir kürzlich gekauft hatte. Die Blumen tauchten ja nun immer mal wieder im Netz auf Karten auf und endlich kann ich selber mit dem Set spielen.
Oh, I finally am able to show a card with the nice flower stamps from Create a Smile stamps, that I recently bought. I saw those flowers around in the internet for a while and finally I can also play with them.


Heute startet eine neue Challenge bei Addicted to Stamps and More: Challenge #155
Today starts a new challenge at Addicted to Stamps and More: Challenge #155

Das Thema ist eine Fotoinspiration. Die ist doch toll, oder?
The theme is a Photo Inspiration. Isn´t it lovely?


Für die Karte habe ich die Blumen zunächst mit VersaMark auf Aquarellpapier gestempelt und mit weißem Embossingpulver embosst. Dann habe ich sie mit Brushos koloriert und anschließend ausgeschnitten. Der Hintergrund in den Textfenstern und auf der Karte ist ebenso mit Brushos gestaltet. Die Textfenster habe ich direkt auf die Karte geklebt, die Blumen mit Abstandspads. Außerdem habe ich die Spitzen der Blumen über einen Stift gezogen um sie nach oben zu biegen. Zur Verzierung habe ich noch Perlen und Pailetten aufgeklebt. Hierfür benutze ich gern Glossy Accents als Kleber.


I first stamped the flowers with VersaMark on water colour paper and then embossed them with white powder. I then coloured them with Brushos, cut them out and pulled the ends of the leaves over a pencil to make them stand up a bit. The background in the sentiment windows and on the card is also coloured with brushos. I glued the windows on the card directly, but used distance pads for the flowers. I used Glossy Accents to fix the beads and the sequins on the card.

Materialliste
Supplies
Stempel / stamps: Create a Smile Botanical Love
Stempelkissen / stamp pad: Versamark; Ranger Distress crushed olive
Embossingpulver / embossing powder: Stampendous! detail white
Brusho lemon, gamboge, orange, scarlet, ost. red, crimson
Stanze / die: Quickutz REV- 0157-5 Happy Birthday


An den folgenden Challenges möchte ich mit meiner Karte teilnehmen.
I would like to participate into the following challenges with my card.
Night Shift Stamping
Challenge gepuncht/Stanzteile
Everybody Art Challenge
Challenge #334 - etwas embosstes
Simon says stamp Monday challenge
Challenge - No ordinary paper
In my case I used "natural cardstock", which has those little spots of orange/brownish pieces in it as the background and watercolour paper for the flowers (I hope you can see that in the photo below)

Dienstag, 28. Juli 2015

Super cat

Zu meinem Geburtstag hatte ich unter anderem ein Stempel-Set geschenkt bekommen, aus dem diese Super-Katze stammt. Hach, ist sie nicht super süß? hihi im wahrsten Sinne des Wortes in diesem Falle, gell? Einfach "super"! Natürlich gibt es noch weitere Superhelden in diesem Set und die werdet Ihr sicher bald hier auch zu sehen bekommen.
For my birthday I received a stamp set, which has the Super Cat from this card included. Isn´t it "super" cute? hihi. There are other heros in this set and for sure you will see more of it here soon.


Der Sketch von CAS(E) this Sketch hat mich auf die Idee dieser Anordnung gebracht und ich fand, dass die Sterne anzuglitzern "super" (hihi) zur Challenge Sparkle and Shine (Glitzer und Glänzen) passt. Der Rahmen ist aus einem "Abfallschnipsel" einer meiner letzten Karten entstanden (das ist das Thema bei Simply Less is More). Erinnert Ihr Euch an die Pilzwiese mit dem Regenbogen? Dies hier war der Teil, den ich innen aus dem Rahmen dort rausgeschnitten hattte. ... und das kann ich noch ein paar mal so weiter machen mit dem Innenteil von diesem Rahmen, und dem nächsten und ... hihi. Mal schauen, wo Ihr das Stück wieder finden werdet. Wir könnten ein Such-mich-Spiel daraus machen: Finde den Schnipsel! Die Medina-Mädels wissen, dass ich jeden Schnipsel aufbewahre und sie dann irgendwo wieder verwende. Meine Randschnipsel-Kiste ist berühmt berüchtigt!
The sketch from CAS(E) this Sketch brought the idea of the arrangement of this card and I thought, that sparkling the stars would fit "super" (hihi) to the challenge theme sparkle and shine. I cut out the frame from a snippet that I had left over from one of my last cards. Snippets is the theme of the current Simply Less is More challenge. Do you remember my mushroom lawn card? This piece was the cut out from that frame over there. I could go on with this a few more times, hihi. Let´s see, where the next piece shows up again. This is a fun game to play with you: Find the snippet! The girls that I go to Medina with know, that I collect every snippet (but only my own snippets) and put it into boxes, because one can use them sometime again. My edge snippets box is very famously known!

Materialliste 
Supplies
Stempel / stamp: Mama Elephant - Tiny Heros; Stampingbella EB208 Laptop girl Perry on her laptop
Stempelkissen / stamp pads: Memento tuxedo black; VersaMark; Marvy Matchables #104 caribbean blue
Embossingpulver: Sparkle N Sprinkle Tequila Sunrise
Copics C1, C3, C5, C7, RV42, BV00, V15, Y38
Stanze / die: Crea-Nest-Lies XXL No.10

Mit meiner Karte möchte ich an den folgenden Challenges teilnehmen.
I would like to participate into the following challenges with my card.
Simon Says stamp Wednesday Challenge
Sparkle and Shine
Stamping Sensations
Challenge July - Feature a Creature
CAS(E) this Sketch
Sketch #133 
Simply Less is More
Week 234 - Recipe: Snippets

Montag, 27. Juli 2015

My line of trees

Anita hat kürzlich einen lieben Kommentar zu meinem Flip Flop Post hinterlassen in dem sie darauf hingewiesen hat, dass bei CASology grad das Thema "Linie/Reihe" ist und ich doch meine Flip Flop Karte dort zeigen könnte. Ich wollte nicht nachträglich eine Karte verlinken, aber ihr Kommentar hat mir eine Idee gebracht. Zunächst habe ich an eine Reihe von Menschen gedacht, doch dann fiel mir diese Baumreihenstanze ein und hier ist also meine CAS Karte zum Thema Reihe.
Anita left a very kind comment lately on my Flip Flop post and was saying, that I should link up my card at the current CASology challenge which has the theme "line". I actually did not want to link up a pre-made card, but her suggestion raised a new idea in my head. I was first thinking of a line of people, but then the trees die came to my mind. So here is my CAS line card for you.


Zur Koloration des Hintergrunds und der Bäume habe ich wieder Brushos benutzt. Es ist ein witziges Phänomen, dass man Stanzteile vorwiegend entweder mit buntem Papier gestanzt und eventuell zusammen geklebt und auch noch ein wenig nachbearbeitet sieht, oder aus weißem Papier gestanzt und dann so belassen, was einen edlen Eindruck gibt. Dies ist meiner Meinung nach ganz stark davon geprägt, dass die Stanzteile auf den Fotos einiger Hersteller besonders filigraner Stanzen in weiß mit Schatten abgebildet sind. Neulich fragte mich nämlich Martina, womit ich denn die Stanzteile auf meiner Karte koloriert hätte. Man kann super Effekte erzielen zum Beipsile mit Copics (wie HIER zu sehen) oder mit Brushos, wie in dem Beispiel von heute.
I used Brushos for the coloration of the background and the trees. It is a really funny phenomenon, that die cut elements are mainly cut either from coloured paper or cardstock and sometimes then assembled in different colours and even shaded a bit or cut out of white paper and left blank. This gives a nice elegant look. From my perspective this is driven by the fact, that some suppliers of especially the very filigree dies use to show their motifs in white with a light shadow underneath. The other day Martina asked me with what I coloured the die cut elements on my card. You can gain super cool effects by colouring for example with Copics (like shown HERE) or with brushos as in this case from today.

Materialliste
Supplies
Stanze / die: EllisonTrees, Forest 22721
Stempel / stamp: Efco 45 112 02
Stempelkissen / stamp pad: Ancient Page flannel grey
Brushos leaf green, sea green, grey

An den folgenden Challenges möchte ich mit meiner Karte teilnehmen.
I would like to participate into the following challenges.
Casology
Week #156 - Line
Color Throwdown
Challenge #352
Freshly made Sketches
Sketch #196

Sonntag, 26. Juli 2015

Knuddelgrüße

Heute stelle ich mich offiziell auf der Facebook-Stempellädle-Seite als neues Designteammitglied vor. Ich hatte Euch ja bereits davon geschrieben, dass ich aufgenommen worden bin in dieses total tolle Team mit super Leuten. Schaut doch mal vorbei, es gibt auch etwas zu gewinnen!
Today I show my introductory post on the Facebook Stempellädle Page as one of the new design team members. I had told you about this recently here on my blog, that I was elected to be one of the lucky members of this cool design team! Have a look, you can win something!


Das Stempelmotiv habe ich mit Copics koloriert. Es handelt sich um einen Digi Stempel von Make it Crafty. Der Rahmen ist mit der Hand geschnitten. Schief angebracht und über den Rand lappend soll er dafür stehen, dass Individualität oft den entscheidenden interessanten Touch gibt. Macht mal was Schräges :) !
I coloured the motif with Copics. The stamp is a digi stamp from Make it Crafty. I cut out the frame by hand. The twisted positioning and the overlapping edges should be an example of individualism, which in many cases gives THE one special touch on your projects. Try something wired and different sometime :) !

Materialliste 
Supplies
Stempel / stamps: Randstempel Make it crafty, Stempelset Efco "Vielen Dank"
Stempelkissen / stamp pad: Ranger Distress chipped sapphire
Copcs Y08, Y38, YR04, R22, R29, R27, R39, YG03, YG25, YG17, V15, V09, BV08, B00, B000, B02, B05, B24, B26, W1, W3, W5

Die Stempel und die Ranger-Stempelkissen findet Ihr im
You can find the stamps and the Ranger stamp pads in the  
Ich habe Euch in der Materialliste einen Direktlink eingefügt.
I added a direct link in the supplies list.

Hier könnt Ihr schon mal meine neue Bestellung vom Lädle sehen. Was ich damit alles anstellen werde? Mal schauen! Ihr werdet es auf dem stempelfrida Blog sehen können!
Here you can already see my new delivery from the Lädle. What will I do with it? Let´s see! You will be able to follow it here on the stempelfrida blog.


An den folgenden Challenges möchte ich  mit meiner Karte teilnehmen.
I would like to participate into the following challenges with my card.
Lawnscaping
Challenge No.110 - Inspired by the rainbow
Bawion
Challenge 31-2015 - Bingo
Ich habe den Begriff Wiese verwendet


Seid ganz herzlich gegrüßt von der
Kind regards from 
stempelfrida

Samstag, 25. Juli 2015

Einladung

Heute gibt es mal einen schnellen und kurzen Beitrag mit einer Einladungskarte. ... Die Mädels kommen! 
Today I have a quick and short post for you with an invitation card. ... The girls are coming! 


Ich habe die folgenden Materialien verwendet.
Supplies:
Stempelkissen /stamp pads: Stampin Up rose red; Distress spun sugar
Stempel /stamps: Stampin Up Regal Rose; Artemio 10001047
Stanzen /dies: Stampin Up oval and scalloped oval; Martha Steward Vine Trim
Prägeschablone / Embossingfolder: Craft Concepts venus

An den folgenden Challenges möchte ich mit meiner Karte teilnehmen.
I would like to participate into the following challenges with my card.
Bawion
KW 30-2015 - Einladung

Simon Says stamp Monday Challenge
I scream for... 
(in my case "invitation")

Freitag, 24. Juli 2015

Sunshine!

Oh ja, so kann man es sich gut gehen lassen, gell? Lädt dieser Sonnenstuhl nicht sehr verlockend zu einem entspannten Tag am Strand ein? Ein Gläschen mit einem kalten Getränk könnte noch dazu gereicht werden!
Oh yes, this is how one can imagine to enjoy a relaxing day at the beach! How nice would it be to lie in this chair for some time and look at the ocean. A glass of a nice cold cocktail would go well with it!


Das Thema Sommer ist ja nun überall zu finden. Gott sei Dank ist unser Wetter auch herrlich sommerlich. Das macht gute Laune. Für die Karte hat mich natürlich die Sonne inspiriert, aber auch Farben und ein Sketch. Die Liste findet Ihr wie immer am Ende des Posts. Beide verwendeten Stempel haben schon viele Jahre auf dem Buckel. Die Sonnenliege ist aus dem Jahr 2004 und bei dem Text weiß ich es leider nicht genau. Ich schätze es sind mindestens acht.
Summer as a theme is around everywhere currently. Thank God, the weather here in Germany is also great and summer like. The nice sunny mood inspired me for this card, but also colours and a sketch. You can find the inspiration list at the bottom of this post as always. Both stamps are already many years old. The deck chair stamp is from the year 2004 and I do not know the exact year of the sentiment stamp, sorry. I would guess it is at least eight years old.


Materialliste
Supplies
Stempel / stamps: Stampin Up (Set unknown, 2004); Flamingo Art Happy Birthday B1291 (Text, year unknown)
Stempelkissen / stamp pad: Memento tuxedo black; Distress Ranger barn door
Copics W1, E31, E00, E33, Y26, B00, Booo, B04, B02, B05, B24, YG03, YG25, YG17, R22, R27, R29
Stanze / dies and punches: Xcut XCU 503408 Scalloped Circle; MFT-375 PCD TRAD Tags STAX; Die-Namics Party Hat Border; Stampin Up Circle 1 1/4", 1 3/8"


An den folgenden Challenges möchte ich mit meiner Karte teilnehmen.
I would like to participate into the following challenges with my card.
Retro Rubber Challenge Blog
Challenge #19 - Inspire me with color
Retro Sketches
Sketch #173 
Alt trifft Neu
Challenge No.9 - Sommer, Sonne, Strand und mehr
Stempelmagie
Challenge #117 - Sommer
Basteltraum
Challenge #31 - Sommer/summer

Donnerstag, 23. Juli 2015

Mohnblume - wie man subtile Strukturen in eine große Fläche zaubern kann

Mit Schablonen kann man herrliche Effekte zaubern. So wirken auch sehr schlichte Karten wunderschön.
You can achieve really gorgeous effects with masks. Even very plain images get an eye catching touch with this technique.


Für diese Karte habe ich eine Schablone mit einem sehr großflächigen Motiv gewählt. Hier kann man sehr schön erkennen, wie die Farbgebung mit Hilfe von Schwämmchen tolle Strukturen und Tiefe erzeugen kann. Dazu wird die Schablone auf dem Untergrund befestigt (zum Beispiel an den Ränern mit Washi Tape) und die Stempelfarbe mit einem kleinen Schwämmchen entweder getupft oder aufgestrichen.
I used a very broad and plain mask for my card so you can see nicely how one can create a very nice structure and depth by applying the ink with sponges. For this technique you fix your mask on your canvas e.g. with Washi tape and apply the colour (e.g. stamp ink) with a little sponge by dabbing or sweeping.

Um nicht zu sehr vom eigentlichen Bild abzulenken habe ich lediglich noch einen schlichten Rahmen angebracht und das Bild mit Abstandshaltern auf der Karte befestigt.
In order not to distract too much from the main image, I only added a plain frame around it and sticked it on a plain card with distance pads.

Ich denke man kann an diesem Beispiel sehr schön erkennen, wie verschieden die Effekte von Stempeln und Schablonen sind.
I think one can nicely see with this example how different the effects are when using masks compared to stamps.

Materialliste
Supplies
Stempelkissen / stamp pads: Adirondack oregano, lettuce, red pepper, cranberry; Memento rich cocoa
Stanze / die: Crea-Nest-Lies XXL No.8
Schablone / mask: Penny Black 25-004 Sun Catcher
Stempel / stamp: Efco 45 112 02

An den folgenden Challenges möchte ich mit meiner Karte teilnehmen.
I would like to join the following challenges with my card.
CAS(E) this Sketch
Sketch #132
The Paper Players
Challenge #254 - Frames
Time Out Challenges
Challenge #36 - CASE Alice 
I am a big fan of Alice Wertz´ cards. I love her special colouring style a lot. My card was inspired by the colours themselves (including text), the transient way how one colour fades into the next, the CAS design and the framing of the main image.

Mittwoch, 22. Juli 2015

Flip Flop vibes - Welcome Asha

Also wenn diese Flip Flops hier nicht den Sommer verbreiten, dann weiß ich es nicht, oder?
Ok, these flip flops here definitely ask for summer, don´t they?


Meine liebe Jessi, vielen lieben Dank für die Randstanzen. Hier kannst Du die erste Anwendung bewundern. Löcher machen, toll! Und wenn es kein CAS Design wäre, so könnte man noch Fransen dran machen, denn die Löcher wären dafür groß genug. Vielleicht mache ich ja mal eine Hula Karte für Dich, hihi.
My dear friend Jessi, thank you so much for the edge dies. You can see the first application of one of them here. Making holes in a row, yieha! And if it wouldn´t be a CAS design, one can even think about putting some string into the holes and make fringes, since the holes would be big enough. Maybe I am going to make a hula card for you some day!

Und auch heute darf ich wieder eine Followerin auf meinem Blog begrüßen. Es ist Asha. Vielen lieben Dank, dass Du dem stempelfrida Blog folgst.
And today again I can welcome a new follower on my blog. Asha, thank you so much for your interest in the stempelfrida blog.

Materialliste
Supplies
Stempel / stamps: Peddler´s Pack; Stempelmeer 7-0211A Sonnige Grüße RF
Stempelkissen / stamp pad: Memento rich cocoa
Stanze / die: Paper Smooches Dots & dashes J3D154

Copics BG15, BG49, BG09, RV04, RV09, E44, E47, E49,
Marker Stampin Up pink passion

An den folgenden Challenges möchte ich mit meiner Karte teilnehmen.
I would like to participate into the following challenges with my card.
CAS Colours & Sketches
Challenge #133 - Colours
Simply Less is More
Week 233 Theme - Life´s a beach
Marker Pop
Challenge #73 - Summertime
Copic Marker Europe
Challenge #41 - Summer Vibes

Dienstag, 21. Juli 2015

Flower bouquet with smooching background - Welcome Dustydavi

Na so was, der In{k}spire_me Blog wird schon 4! Meinen herzlichen Glückwunsch geht an das Designteam! Ihr macht immer tolle Challenges. Die Leute lieben sie und machen gern mit. Hier ist meine Geburtstagskarte für Euch, die ich nach der Farbvorgabe der Challenge #95 gewerkelt habe. 
Can you believe it? The In{k}spire_me blog already turns 4! I would like to send my hearty congratulations to the design team! You really provide so nice challenges and the crafters and stampers love them. Here is my Birthday card for you, which I designed following colour challenge #95.


Herzlich Willkommen, Dustydavi auf dem stempelfrida Blog! Ich freue mich sehr, dass Du Dich als Followerin registriert hast.
Welcome, Dustydavi, on the stempelfrida blog! I am so happy you signed up as follower of my blog.

Für den Hintergrund der Karte habe ich zunächst den Stempel mit VersaMark gestempelt und dann mit weißem Embossingpuler embosst. Darauf habe ich die kürzlich beschriebene Smooching Technik angewendet (klickst Du HIER). Die Blumen habe ich gestempelt und danach ausgeschnitten. Um einen verschieden farbigen Abdruck zu bekommen male ich den Stempel entsprechend mit wasserlöslichen Markern an. Den Abdruck habe ich noch mit Farbe und Wasser nachbearbeitet um Strukturen und Details  wie die Muster auf den Blüten herauszuarbeiten. 

 
I stamped the background structure for the card with VersaMark and embossed it with white embossing powder. On this surface a used the formerly described smooching technique (CLICK). The flowers are stamped and cut out. To achieve a multi-coloured image when stamping I use water soluble marker to paint on my stamp. After stamping I worked further on the image to create details and structure as you can see on the flower tips.


Materialliste 
Supplies
Marker: Stampin Up regal rose, primrose petal, rasperry ripple, wild wasabi, bordering blue
Stempel / stamps: Paper Artsy EDY13 ElectTica3; Artemio 10001047; Stampin Up French Filigree
Stanze / die: Rayher 59239000
Embossingpulver: Stampendous! detail white


An den folgenden Challenges möchte ich mit meiner Karte teilnehmen.
I would like to participate intot he following challenges with my card.
In{k}spire_me
Challenge #207 - Geburtstagsspecial any of the former challenges or combination of two 
in my case Challenge #95 
Craft Stamper
Take it make it challenge July - Take a stamp anything goes
Happy little stampers
July Sketch Challenge